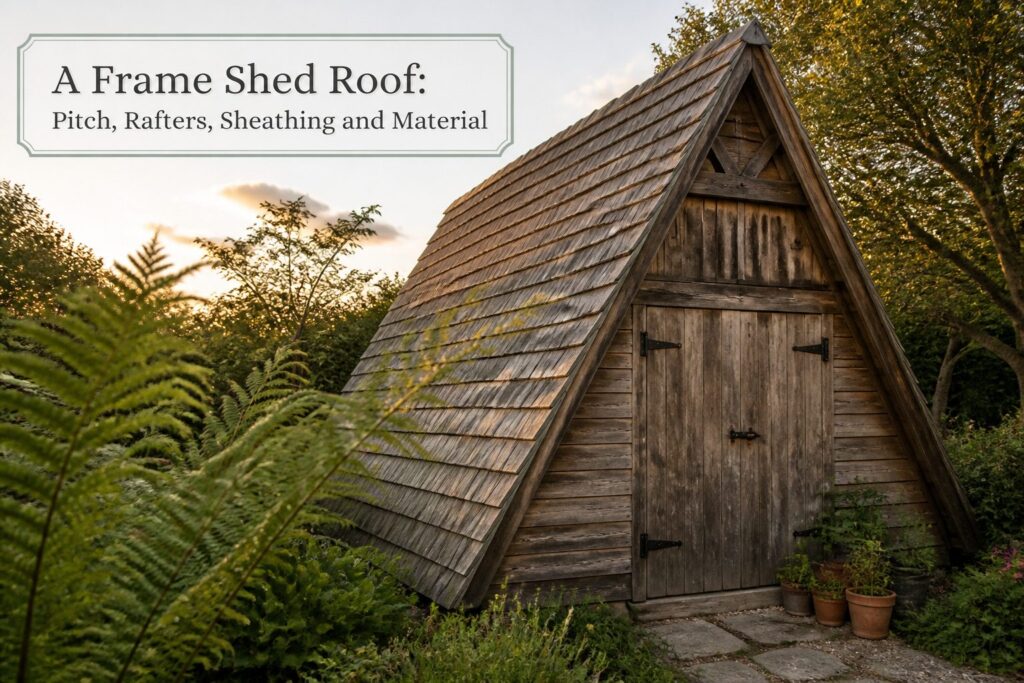
An A-frame shed roof is a single triangular structure where two matching slopes meet at a center ridge, forming the entire roof and front wall of the building.
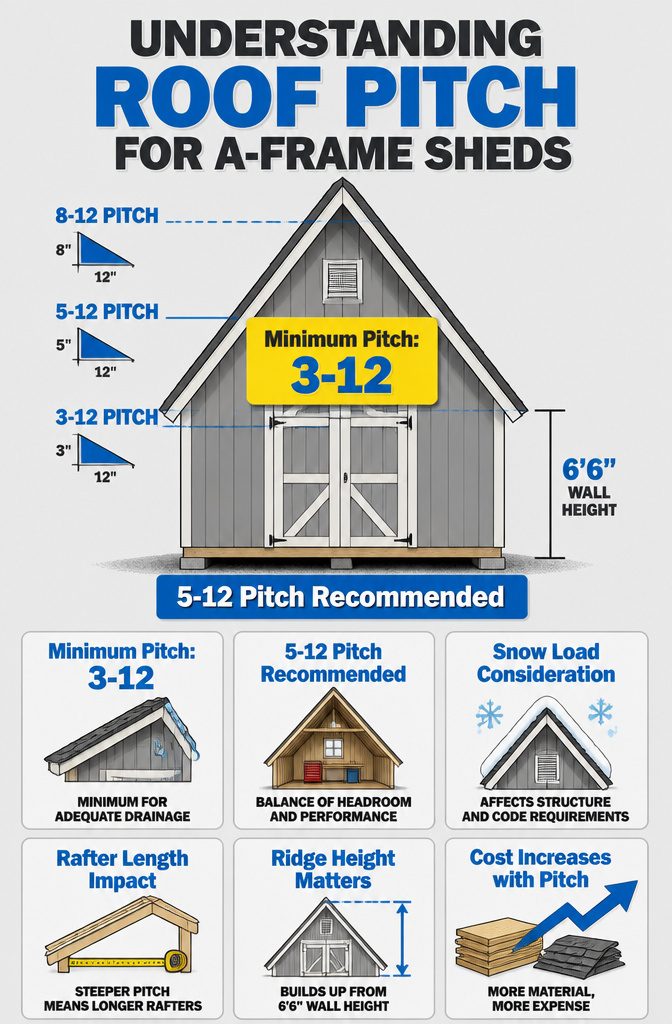
The pitch you choose determines everything that follows: go below 3-12 and water pools, go too steep and the lumber bill balloons while the roof towers awkwardly over standard 6’6" walls.
Lapp Structures lands at 5-12, a slope that sheds moderate snow without turning a backyard shed into a cabin wearing a hat.
I learned the hard way that rafters cut from a bad template drift by degrees at the peak; one afternoon’s mistake cost me an hour and a half pulling every board back down.
[link-whisper-related-posts]Planning the Roof Pitch
An A-frame shed roof starts with a decision most people make backwards: they pick the look, then hope the pitch handles the weather. The pitch has to handle the weather first.
Water and snow run off a roof because the slope gives them somewhere to go, and the minimum pitch for adequate drainage is 3-12, meaning three inches of rise for every twelve inches of horizontal run.
Anything flatter than that pools water and voids most shingle warranties.
The proportions change fast once you commit. A 5-12 pitch, the kind Lapp Structures uses on their A-frame sheds, gives you headroom inside and enough slope for moderate snow country without the steep lumber bill of a cabin-style roof.
Go steeper and the rafters lengthen, the sheathing multiplies, and the whole thing starts to tower over a standard 6’6" wall height in a way that looks wrong against a fence line.
I have seen sheds where the roof mass dwarfs the walls and the result looks like a lean-to wearing a hat.
Snow load is the quiet factor here.
A lower pitch holds snow longer; a steeper one sheds it faster but catches more wind. Most jurisdictions in snow country want engineering above a certain load threshold, and the pitch you choose feeds directly into that calculation.
The 6’6" wall height matters because it sets your baseline: from there, every inch of pitch adds to your ridge height and your lumber order. Plan the triangle from the floor up, not from the catalog photo down.
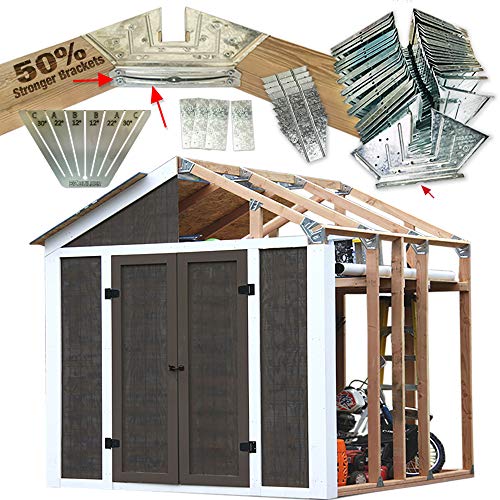
50% STONGER - Have you tried a framer kit from the other guys? Did the brackets bend when you flipped it over? EZBUILDER has the solution! Now 50% stronger, galvanized steel brackets make your build a breeze. Multiple screw points and reinforced truss design provide you with superior strength to your frame.
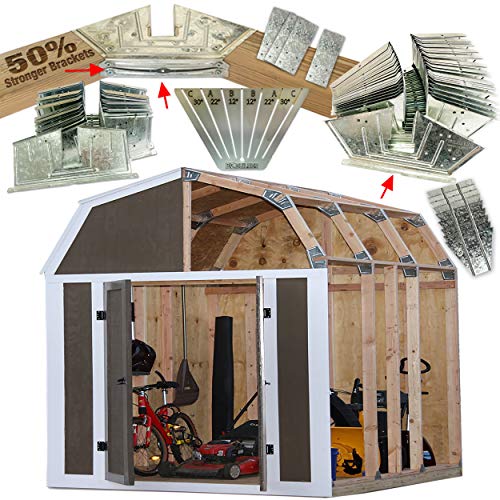
50% STONGER - Have you tried a framer kit from the other guys? Did the brackets bend when you flipped it over? EZBUILDER has the solution! Now 50% stronger, galvanized steel brackets make your build a breeze. Multiple screw points and reinforced truss design provide you with superior strength to your frame.
Cutting the Rafters
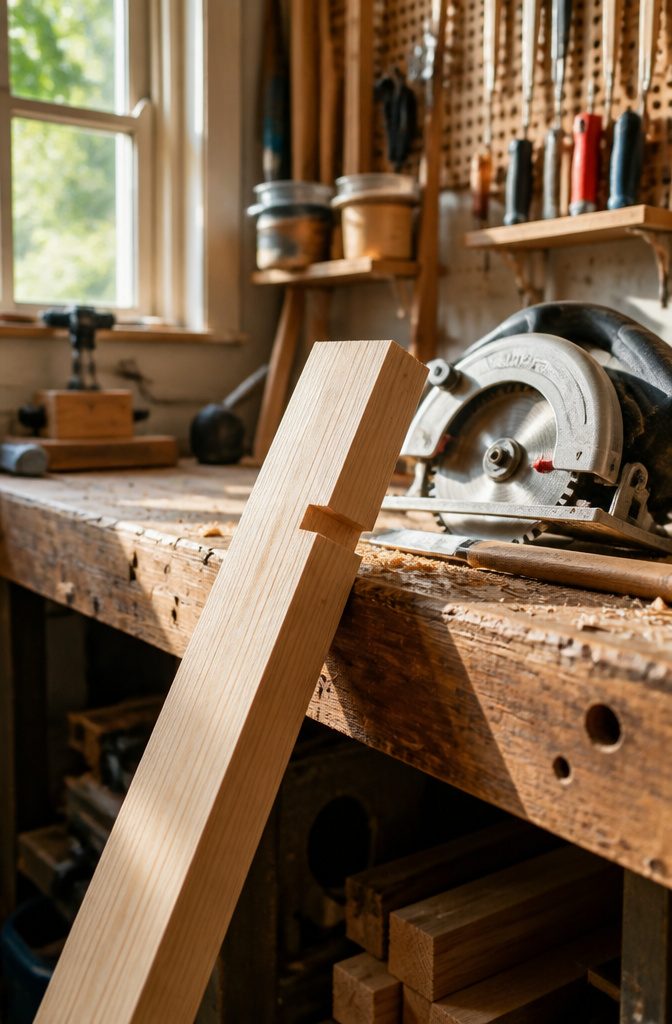
Rafters for a small A-frame shed are almost always 2×4 boards, which is where I started on my first build.
The birdsmouth cut, the notch that lets the rafter sit flat on the wall plate, needs to match the width of that plate exactly.
I traced a scrap block cut to the same width as my plate and marked the notch onto the rafter face, then cut it with a circular saw and finished the corner with a handsaw.
The ridge angle at the peak is simply the roof pitch angle carried across both meeting faces. On that first shed I eyeballed the bevel instead of setting the saw precisely, and the angle ran off by about three degrees.
By the third rafter the peak had drifted badly enough that I had to pull them all and start fresh with a properly cut template.
The lesson cost me an hour and a half on a Saturday I had planned to finish in.
Mark every board from one good template, or at least mark them all at once before any sawdust flies. The cutting goes fast once the setup is right, but only if the setup is right.

🔥 Aircraft-Grade Aluminum - Thickened die-cast alloy with matte oxidation resistance coating ensures 0.1mm precision, 3X longer lifespan than stamped squares.

Sloped up 45°(12:12) Joist Hanger fit 4x6 Lumber

Packing List: 1pc 24x13.5 Gable Plate
Setting the Rafters
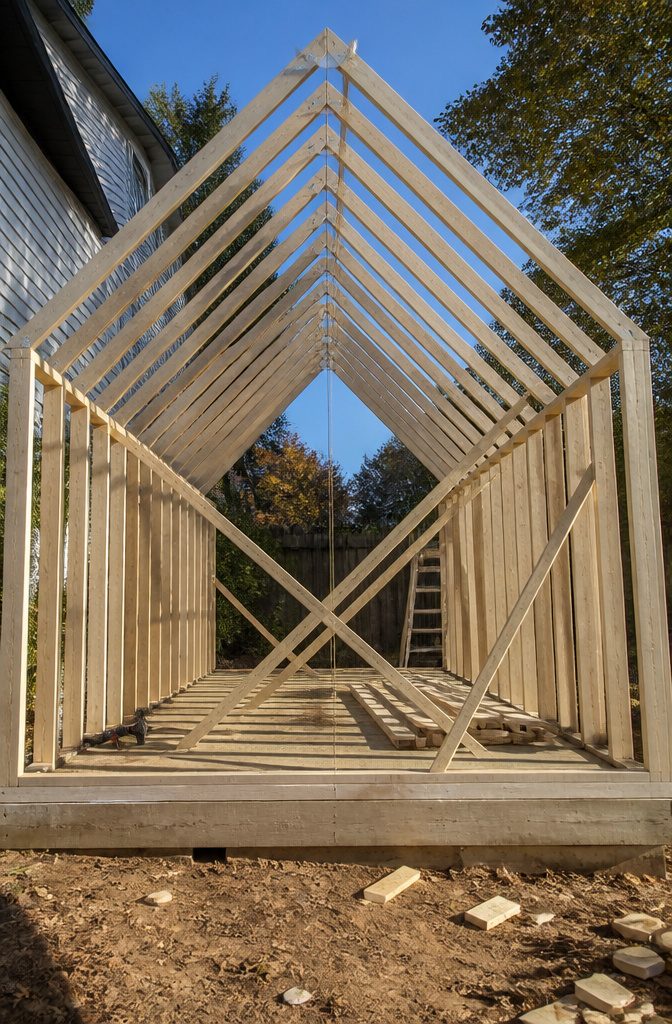
Two by fours on sixteen-inch centers is the standard that keeps an A-frame shed roof from sagging under snow load, and that spacing is what the pre-cut plans assume.
I mark every sixteen inches along the wall plates before a single board goes up, working from the same corner so the layout doesn’t drift.
The first pair of rafters at each end need temporary bracing, a pair of scrap two-by-fours nailed vertically to hold them plumb while the ridge board or centering string goes in.
A pulled-tight string between the peaks gives the eye a straight reference, and the birdsmouth notches must seat flush on the wall plates with the outside edge of each rafter aligned to the outside edge of the wall below it.
Plumb matters more than speed here. A rafter even an inch out of vertical at the base puts the peak off by inches and throws every following board out of alignment.
I check with a level on the face of each rafter before driving the final nails, adjusting while the temporary braces still allow movement.
Once the third or fourth pair is in and the centering string confirms the line holds true, the rhythm picks up.
The moment that makes the hours worthwhile comes after half a dozen rafters are set.
Step back far enough to see both slopes at once, and the triangle is suddenly there, a shape your eye recognizes before your mind catches up. The rest becomes finish work after that.

✅Reliable Roof Shield — Sheds rain, shields against harsh sun, and helps keep leaves, dust, and snow off your shed roof year-round. The full-coverage panel drapes over the whole roof surface, helping keep the roofline dry and clean — helping metal, plastic, or wood roofs hold up season after season.

【Polycarbonate Roof Sheet】The roof panel is made of high-performance film, reinforced polyester resin and fiberglass, which has good UV resistance and self-cleaning ability. Waterproof and leakproof, heat insulation and cold protection. Insulates well and can be used to replace glass in greenhouses.

Code-Compliant 30 Degree Framing Nails: Each box contains 1,000PCS precision-engineered 3" x 0.120" 30 degree framing nails with a full offset round head that meets IBC/IRC building codes for hassle-free inspections. meite paper colated nails are compatible with Paslode, Metabo HPT, Grip-Rite, Freeman, and Bostitch 30-34 framing nailers. Note: Verify your framing nail gun accepts offset round head framing nails
Laying the Sheathing
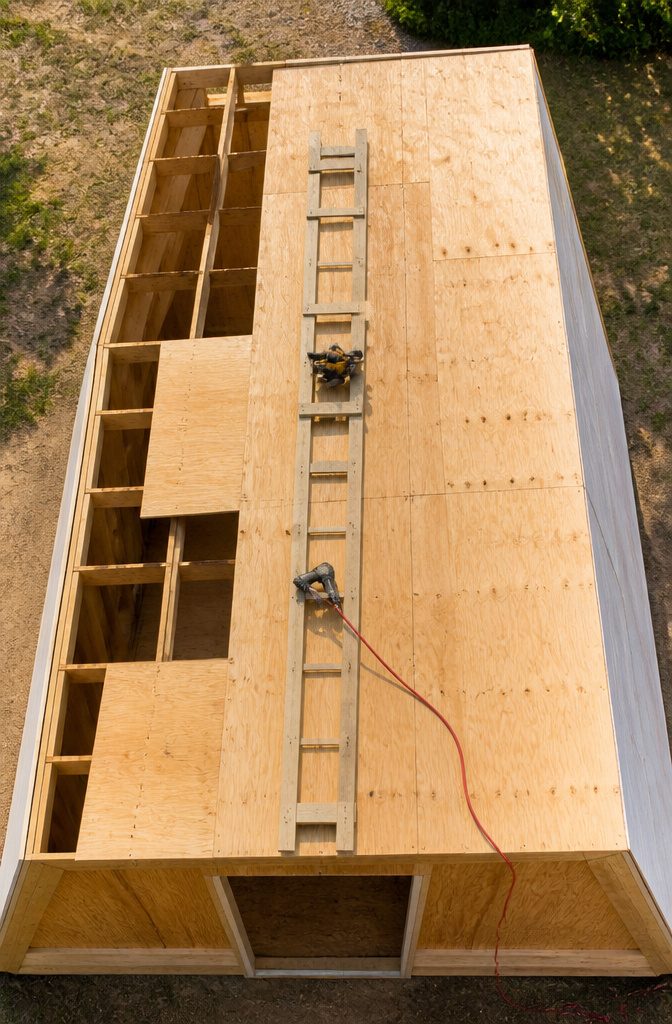
Half-inch exterior-grade plywood sheathing gives an A-frame shed roof the rigidity it needs to walk on during later stages.
The 7/16 in OSB that some guides mention for small projects flexes noticeably underfoot on a steep pitch, and I would not trust it until the roofing layers go on.
Plywood at the full 1/2 in lands firmer between rafters spaced 16 in on center.
Stagger the seams so no break lines up rafter to rafter.
Each sheet end should hit the middle third of the rafter beneath it, giving the next sheet solid wood to nail into. Keep the grain running the same direction across the roof; the consistent pattern adds strength.
I fastened with 8d ring-shank nails in a 6 in pattern at edges, 12 in in the field, working from a ladder and reaching as far as I could safely manage.
One afternoon I ran short by two sheets. The math had been right on paper, but a miscut at the peak ate the margin.
A second lumber run costs more in time than in money, and the daylight I lost meant finishing fasteners by headlamp. Order at least one extra sheet; the $20 insurance beats the trip.

Reinforces one roof truss

Reinforces four roof trusses

The original USA-made Snow Roof Rake
Adding Roofing Material
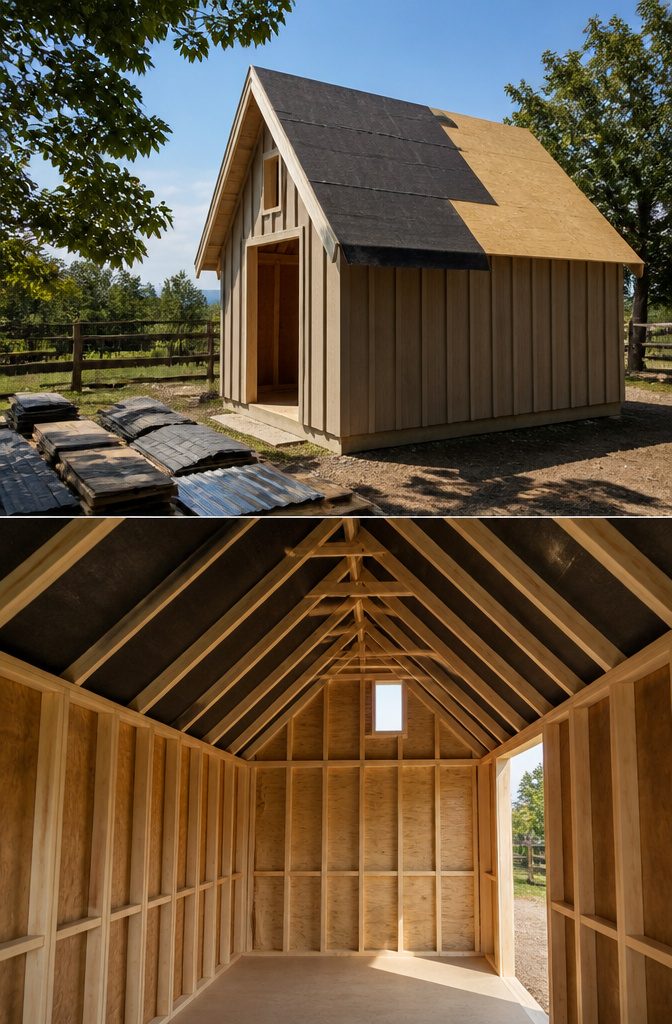
Roofing felt goes down first, and the weight matters more than most people expect. I used 15-pound felt on a small garden shed and watched it tear in a gust before I could shingle over it.
30-pound felt is the safer bet for an A-frame, with each strip overlapping the one below by at least 2 inches and the ends lapping 4 inches. Staple it straight and wrinkle-free; every bubble telegraphs through to the finished roof.
For the material itself, three options cover most builds. Architectural shingles are what I chose for that first shed: cheap, forgiving to install, and available in colors that don’t fight the house.
Ribbed metal costs more upfront but goes on fast with exposed fasteners, and the ribs hide minor sins in the sheathing.
Standing-seam metal is the premium third choice, cleaner looking and longer lasting because the fasteners hide under the seams, though the panels need more skill to fit.
My second shed got ribbed metal, mostly because I was tired of replacing shingles after wind events.
Metal needs painting every two to three years to stay ahead of rust, which is the real cost no one puts in the estimate.
Between that maintenance and the higher initial price, asphalt still wins for a structure you might outgrow.
Wood-Metal Composite Frame + Weather-Resistant Exterior: The frame combines solid wood and iron for strong load-bearing capacity and stability. The outer weather-resistant plastic roof and panels are designed to resist rust, corrosion, and cracking, offering durable performance for outdoor storage.

DURABLE FRAME: Made from an all-steel metal 6 x 6 x 6-foot frame that is 1-3/8 inches thick

DURABLE FRAME: Made from an all-steel metal 6 x 12 x 8-foot frame that is 1-3/8 inches thick
Fascia and Finishing
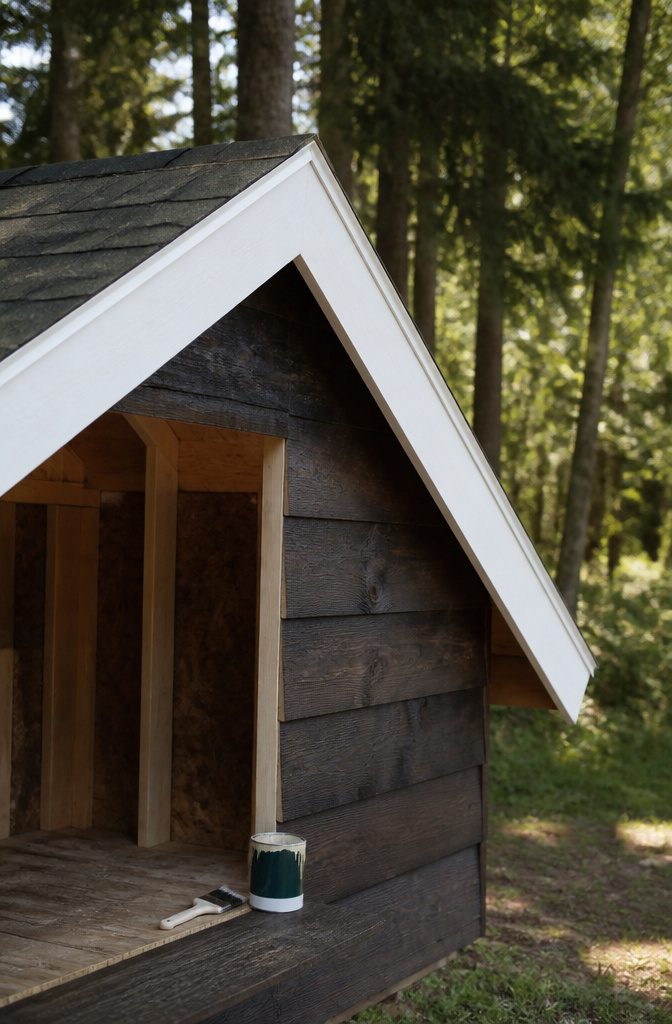
The fascia board on an A-frame shed roof does more than tidy the edge.
It closes the gap between rafter tail and wall, blocks rot from water running back, and gives the gutter something solid to bite into. I used painted pine on my first build because it was cheap and already primed.
Five years of summer sun later it checked and peeled like old wallpaper. Now I spend the extra on PVC or at least a composite that moves less and holds paint without the grain telegraphing through.
Overhangs matter on a shed even when the walls are siding and not brick. They throw rain clear of the foundation splash zone and keep the wall drier in driving weather.
I ran a 6-inch overhang on the eaves and nothing on the gable ends, which was fine until I stored a lawn tractor under the bare gable and the drip line kept the hood wet all winter.
I skipped the ridge vent on a storage-only shed and regretted it.
Condensation from temperature swings warped a plywood shelf against the back wall over two seasons. The roof deck was fine because it could breathe upward, but the trapped humid air found the coldest surface and stayed there.
Even a few square inches of vented soffit or a gable-end louver would have moved enough air to stop it.

Complete Size Set: This 3 piece rafter square set includes 4 inch, 6 inch, and 12 inch triangular rulers to handle everything from tight space marking to large scale roofing layouts. The varied sizes cover more project needs than a single tool.
Complete 3 Size Set: Includes compact 4 inch and 6 inch squares for tight spaces, tool belts, and small trim work, plus a robust 12 inch square for full scale framing and roofing projects. This eliminates the need to buy separate tools, offering maximum versatility across various carpentry jobs and ensuring you always have the right size within

🔥 Aircraft-Grade Aluminum - Thickened die-cast alloy with matte oxidation resistance coating ensures 0.1mm precision, 3X longer lifespan than stamped squares.
Roof Styles Compared
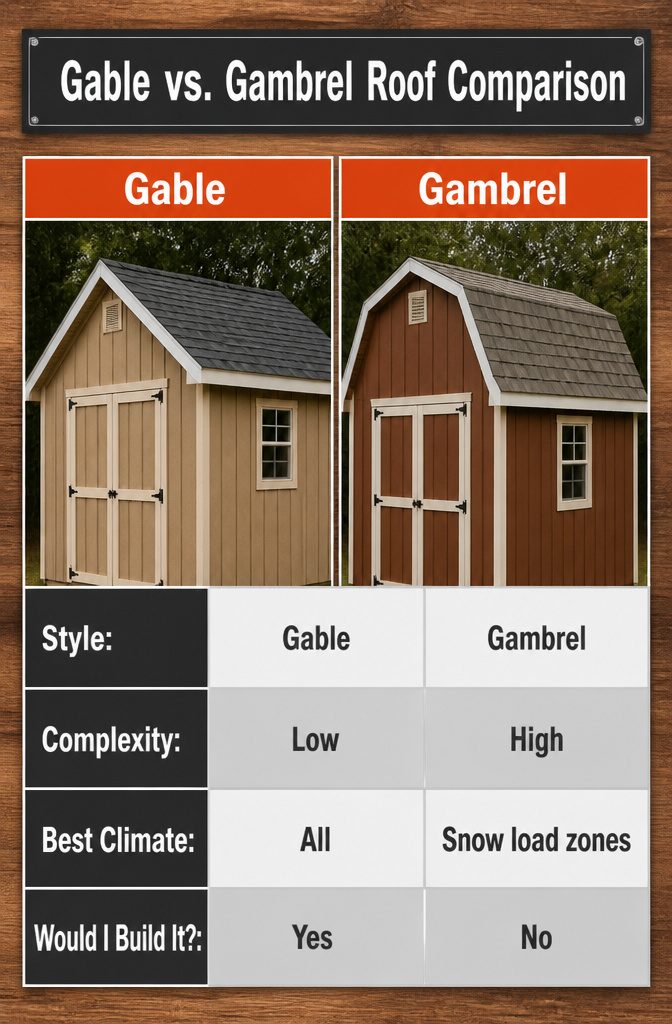
Gable roofs carry a single peak with two matching slopes, the simplest geometry to frame and the one most of us picture when we think "shed."
Gambrel roofs add a second slope on each side, the lower one nearly vertical, which buys extra headroom inside but doubles the cuts and the chances for a leak at the break.
Skillion roofs run one flat plane from high to low, so you are cutting identical rafters every time and nailing them to a single ledger, though that shallow pitch needs watching in snow country.
Saltbox roofs throw in a short reverse slope opposite the long one, more silhouette than shed style, and the asymmetry means every rafter pair is a different length.
For a weekend build with my own hands and maybe $800 in lumber, the table breaks it down:
| Style | Complexity | Best Climate | Would I Build It? |
|---|---|---|---|
| Gable/A-frame | Low | All | Yes. Two identical rafter templates, no valleys, and the steep slope sheds rain and snow without fuss. |
| Gambrel | High | Snow load zones | No. The extra headroom is real, but the hip joints and trim work eat a second weekend I do not have. |
| Skillion | Lowest | Dry or mild | Maybe. One plane means speed, though a pitch under 3–12 traps water and violates code; I would hold to at least 6–12 if I lived where storms hit. |
| Saltbox | Moderate | Wind-driven rain | No. The look is New England charm, but the uneven walls complicate siding and the short slope is a leak waiting to happen on a budget build. |
A 6–12 pitch or steeper is where I land every time: steep enough to clear debris, shallow enough that a 10-foot rafter still fits in my hatchback.
Code-Compliant 30 Degree Framing Nails: Each box contains 1,000PCS precision-engineered 3" x 0.120" 30 degree framing nails with a full offset round head that meets IBC/IRC...
Roofing Materials Compared
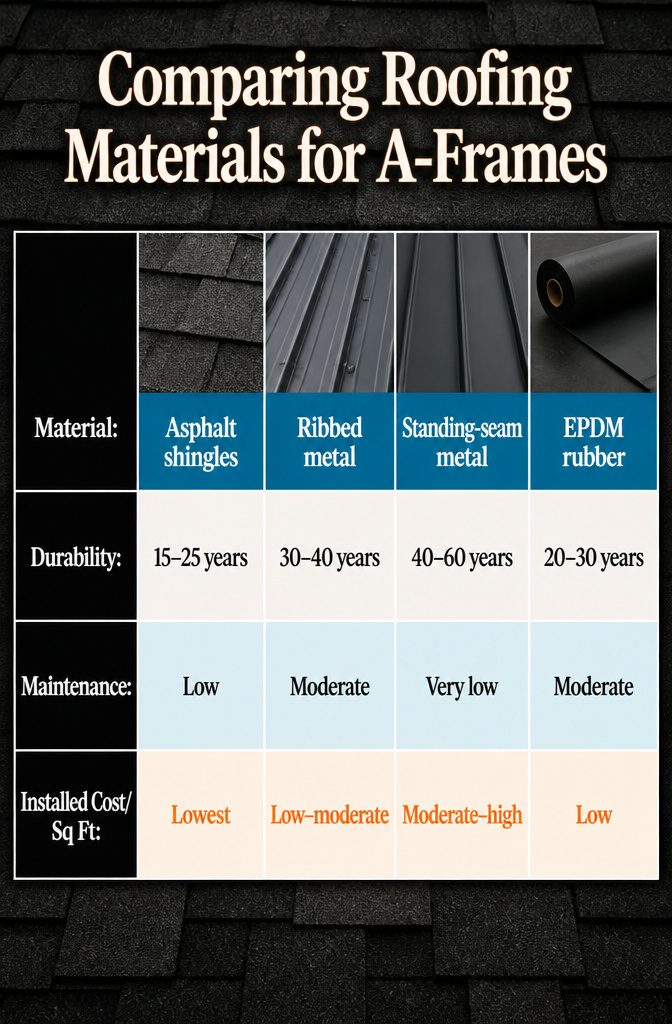
Asphalt shingles and metal roofing each handle the A-frame’s steep slope differently, and the cost gap between them is wider than most people expect going in.
Ribbed metal runs cheaper per square foot installed than standing-seam, but the exposed fasteners need checking every few years for loosening or seal breakdown.
Standing-seam hides its fasteners entirely, which is why it lasts longer and costs roughly a third more upfront.
Asphalt splits the difference on price and asks the least skill to install, though granule loss and cracked tabs show up faster on a shed that bakes without attic ventilation.
| Material | Durability | Maintenance | Installed Cost/Sq Ft |
|---|---|---|---|
| Asphalt shingles | 15–25 years | Low; replace damaged tabs | Lowest |
| Ribbed metal | 30–40 years | Moderate; inspect/reseal fasteners | Low–moderate |
| Standing-seam metal | 40–60 years | Very low | Moderate–high |
| EPDM rubber | 20–30 years | Moderate; check seams and ponding | Low |
EPDM belongs here because flat-roof shed owners will find it in search results and wonder.
For an A-frame, skip it: the membrane needs a nearly level surface to seal, and water on a steep pitch runs too fast for the adhesive seams to matter.
Standing-seam is the one to beat if the shed sits under trees that drop branches, since dented panels hide damage better than torn shingles.

Versatile Rake: Perfect for removing snow, wet leaves, and debris from roofs without climbing, the roof rake ensures optimal utility
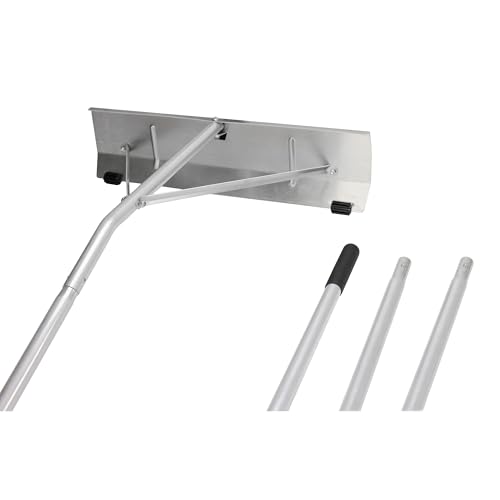
Angled blade offers more use in less space and is effective on low pitched roofs and two-story houses

SECURE SNOW RETENTION – Prevents dangerous sheets of snow and ice from sliding off metal roofs, protecting gutters, landscaping, and property below.
Siding and Customization
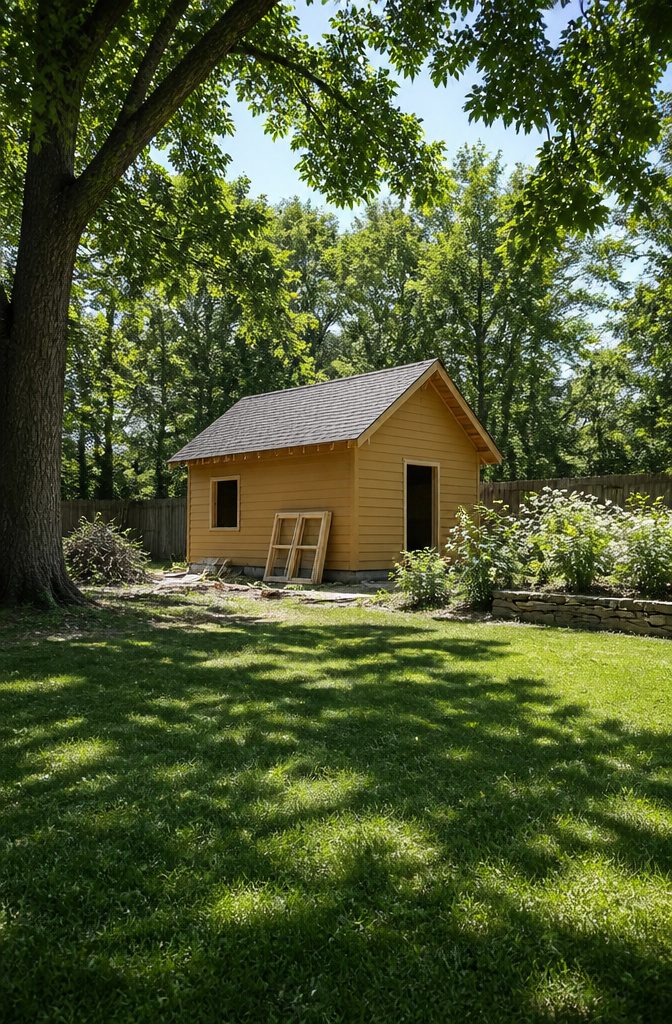
Vinyl, engineered wood, or real masonry each carry a shed in a different direction, and on an A-frame the siding is doing more work than usual because those steep walls are the whole visual show.
LP SmartPanel board-and-batten stacked vertically matches the roofline’s own thrust; James Hardie plank run horizontal plays against it.
Stone or stucco reads as permanent, but the weight wants real footings, and a weekend build on skids is not the place for it.
My own shed sits on a treated-lumber frame with LP lap siding kept simple. The detail I would repeat is a vertical slider with a built-in screen, set dead center in the gable end.
It cost me one extra trip for the rough opening and flashing, but the cross-ventilation matters more than the view, and the screen keeps wasps from nesting in the ridge vent.
I also tacked on a 2-foot porch roof over the door, nothing timber-framed like the porch walls in that Alaska build where they numbered joints in a heated garage first.
Two posts, a ledger, three rafters, and corrugated metal took a second Saturday.
The roof catches drip from the main eave and gives dry entry, which in practice means muddy boots stay outside and the first thing inside stays plywood-dry. That porch is what people photograph, not the siding.

FASTER ASSEMBLY: 50% less hardware than the standard leading shed for 50% faster assembly

Durable all-steel metal frame that is 1-3/8 inches thick with premium powder-coated finish prevents chipping, peeling, rust and corrosion. Grey ripstop cover is waterproof and UV-treated.

DURABLE FRAME: The Shed-in-a-Box is made from an all-steel metal 8 x 8 x 8-foot frame that is 1-3/8 inches thick and bonded with a premium powder-coated finish that prevents chipping, peeling, rust, and corrosion.
Interior Options Worth Adding Later
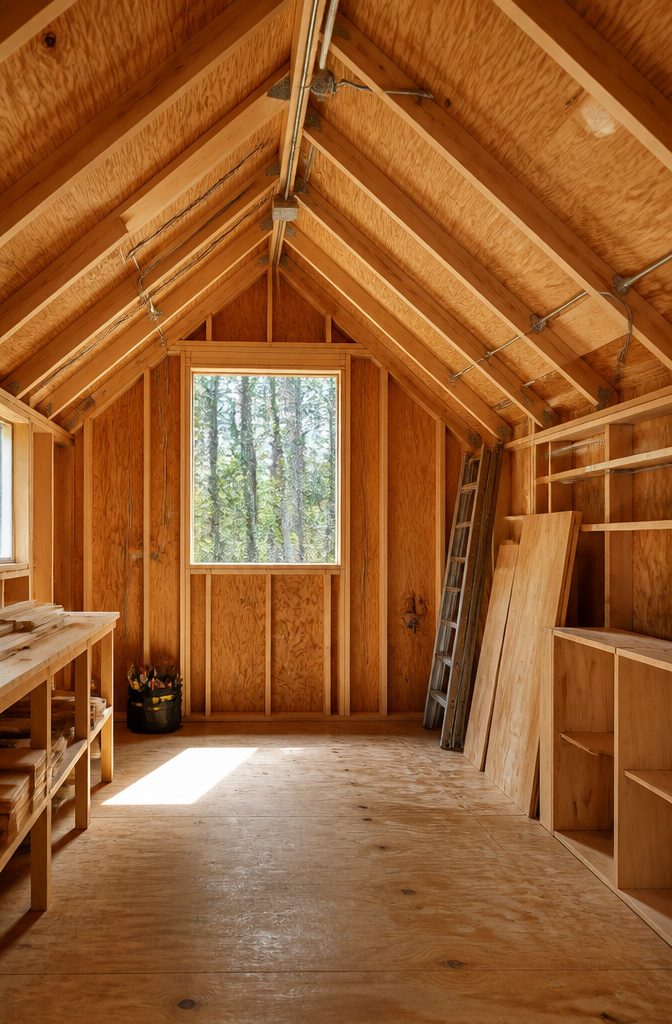
Electrical rough-in is the one interior upgrade that pays to plan during construction even if you wait years to finish it.
I ran ¾-inch PVC conduit for a single outlet through my A-frame shed roof assembly while the sheathing was still open, then let it sit empty for two years before pulling 12-gauge wire and adding the receptacle.
The conduit cost maybe eight dollars in fittings; adding it later would have meant dismantling roof panels or drilling blind through finished rafters.
Finished interiors are easier to sequence after the fact.
Tongue-and-groove pine or beaded plywood goes up faster when the roof is already keeping the weather out, and you can see exactly where the rafter bays fall before committing to a layout.
Shadow-gap detailing, which leaves a thin reveal between boards, is forgiving of the slight seasonal movement that happens in an unconditioned shed; it looks intentional rather than like shrinkage you failed to account for.
Storage solutions fall into the same category. Wall-mounted systems or overhead bins need anchor points that should hit framing, and the roof structure tells you where that framing actually is once the sheathing is on.
Waiting lets you live with the space, notice where the light falls, and place shelves where you will actually use them rather than where the drawing suggested.

This useful bracket allows the opportunity to make otherwise unusable sloped ceiling space, into an area for hanging clothes with a shelving unit! With its multiple adjustments, the Sloped Ceiling Clothes Rod Bracket allows either contractor or consumer a simple way to make unused space functional.

Electro Galvanized for superior corrosion protection

This useful bracket allows the opportunity to make otherwise unusable sloped ceiling space, into an area for hanging clothes! With its multiple adjustments, the Sloped Ceiling Clothes Rod Bracket allows either contractor or consumer a simple way to make unused space functional.
Floor Frame Basics
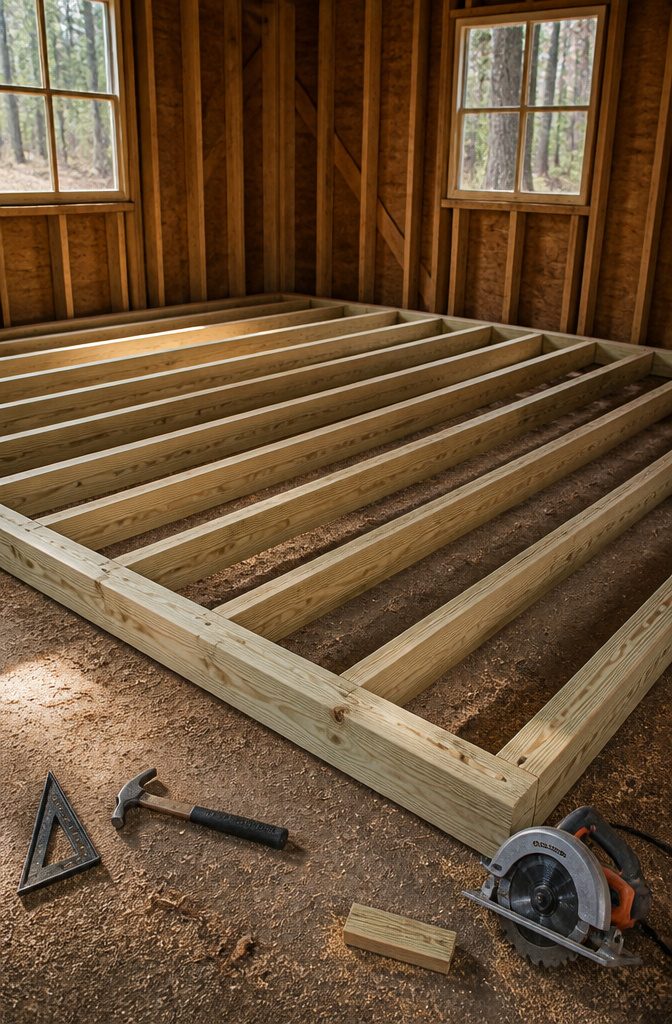
2×4 pressure-treated floor joists laid across 4×4 runners give an A-frame shed the flat, honest plane everything above has to trust.
I spaced mine at 16 inches on center, then ran 5/8 inch exterior-grade plywood across the top. That thickness has enough body to stay true underfoot without telegraphing every runner below.
The roof alignment lives or dies here. An uneven floor tilts the wall plates, and those plates angle the rafters upward until the ridge gap shows daylight where the peaks should meet.
I check the frame with a long level before the plywood goes down, shimming low spots or planing high ones rather than hoping the walls will absorb the error.
They will not. The A-frame has no overhangs or fascia tricks to hide a frame that starts out of plumb; every rafter carries the mistake straight to the top.
Pressure-treated 4×4 runners resist the moisture that collects near grade, and the 2×4 joist height keeps the finished floor low enough to step into without a threshold ramp.
One choice to make: the joists sit on top of the runners in the standard build, which keeps the assembly simple but sets your finished height by the runner spacing you can manage on site.
Frequently Asked Questions
What is an A-frame shed?
An A-frame shed is a simple, versatile structure with a triangular roof design that works for storage or as a small outdoor room.
Its compact size and traditional shape make it fit most backyards, and it stays budget-friendly because the two identical roof slopes need only one rafter template.
Lapp Structures uses it as their most economical option, with a 5-12 pitch and compact overhangs.
How do you build an A-frame shed roof?
Start by choosing a pitch of at least 3-12 for drainage, then mark and cut your rafters from a single template to keep the ridge angle consistent.
Set the first pairs at each end with temporary braces, check them plumb with a level, and fill in between on 16-inch centers using a string line at the peaks for alignment.
Finish with 1/2-inch plywood sheathing, 30-pound felt, and your choice of shingles or metal roofing.
What materials do I need for an A-frame shed?
You will need 2×4 rafter boards, 1/2-inch exterior-grade plywood sheathing, 30-pound roofing felt, and shingles or metal panels for the roof surface.
For the structure below, pressure-treated 2×4 floor joists on 4×4 runners and 5/8-inch plywood flooring form the base that keeps the walls and roof plumb.
Extras worth adding: PVC fascia boards instead of pine, and 3/4-inch electrical conduit roughed in before the sheathing closes up.
What is a shed style roof?
A shed-style roof is a single sloping plane, also called a skillion roof, that runs from a high wall to a low wall without any ridge or peak.
It is the simplest to frame because every rafter is identical and nails to one ledger board, though the shallow pitch needs careful watching in snow country.
For an A-frame specifically, the term usually gets used loosely to mean the roof of a shed, not this single-slope style; the A-frame itself has two matching slopes forming a triangle.
How far can a 2×8 span for a shed roof?
For longer spans or heavier snow loads, a larger rafter size would be needed, but the piece focuses on compact builds where 2x4s suffice.
Check your local code or a span calculator for exact 2×8 distances, since load requirements vary by jurisdiction.
What are the three types of roofs?
The A-frame or gable is the simplest, with two matching slopes; gambrel adds a second slope for headroom; skillion uses one flat plane; and saltbox creates an asymmetrical silhouette with two different wall heights.
For a weekend build, the author recommends the A-frame every time for its low complexity and reliable performance in all climates.
What is the pitch of a 10×12 shed roof?
Lapp Structures uses a 5-12 pitch on their A-frame sheds, which balances headroom inside against lumber cost and ridge height.
On a 10-foot-wide shed, a 6-12 pitch would put the ridge 30 inches above the wall plates, so plan from the floor up to keep the proportions right against a standard 6-foot-6 wall.