These 10 DIY craft Christmas trees run from a single jar of buttons to a full scrap-wood build with a drill involved, so the deciding factor is how much of your weekend you are willing to give and whether a child is helping.
The unicorn ornament only needs a plastic ball, two clay ropes twisted for the horn, and iridescent glitter from thinned Mod Podge; the 3D origami star wants 6-inch paper, thick stock, and the patience to restart once.
[link-whisper-related-posts]1. Unicorn Ornament
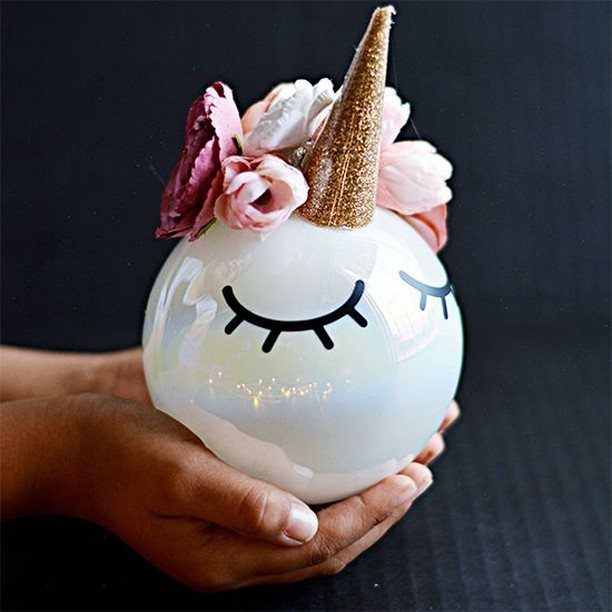
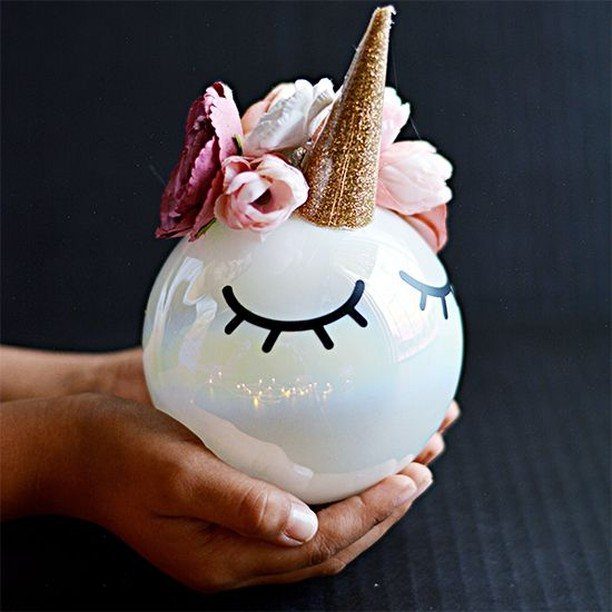
A plastic ball becomes a sleeping unicorn with nothing more than clay, Mod Podge, and glitter.
This one works for kids old enough to handle a glue mixture and young enough to still gasp at glitter.
The horn starts as 2 clay ropes twisted together and baked per the package instructions; the iridescent finish comes from rolling the ball in thinned Mod Podge, then in glitter, and repeating until the coverage holds.
Painted eyelashes and faux flowers finish the face after the horn goes on.
Those details are optional. The base material matters more: plastic with a lid handles the rolling better than glass, and the lid hole hides under the horn placement.
2. Paint
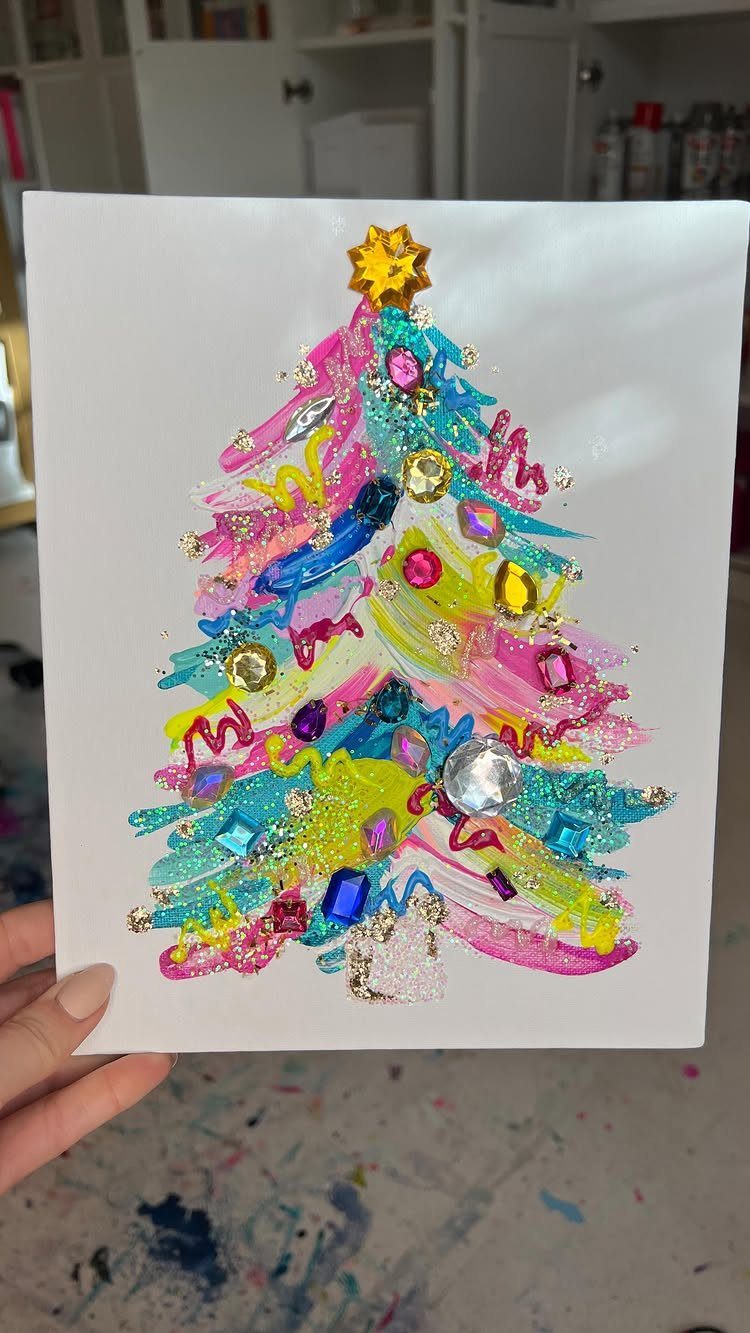
A canvas, acrylic paint, and whatever texture you have on hand.
The visible tree carries faux gems and glitter pressed into wet paint, which means cleanup is minimal and dry time is the only real wait.
Before starting, decide whether you want bright white that reads as snow or something you can distress later; bold color on white is one direction, but the base could go anywhere.
Check that your canvas size fits where you plan to display it. A square format sits well on a shelf or a wall.
3. DIY Origami Christmas Tree
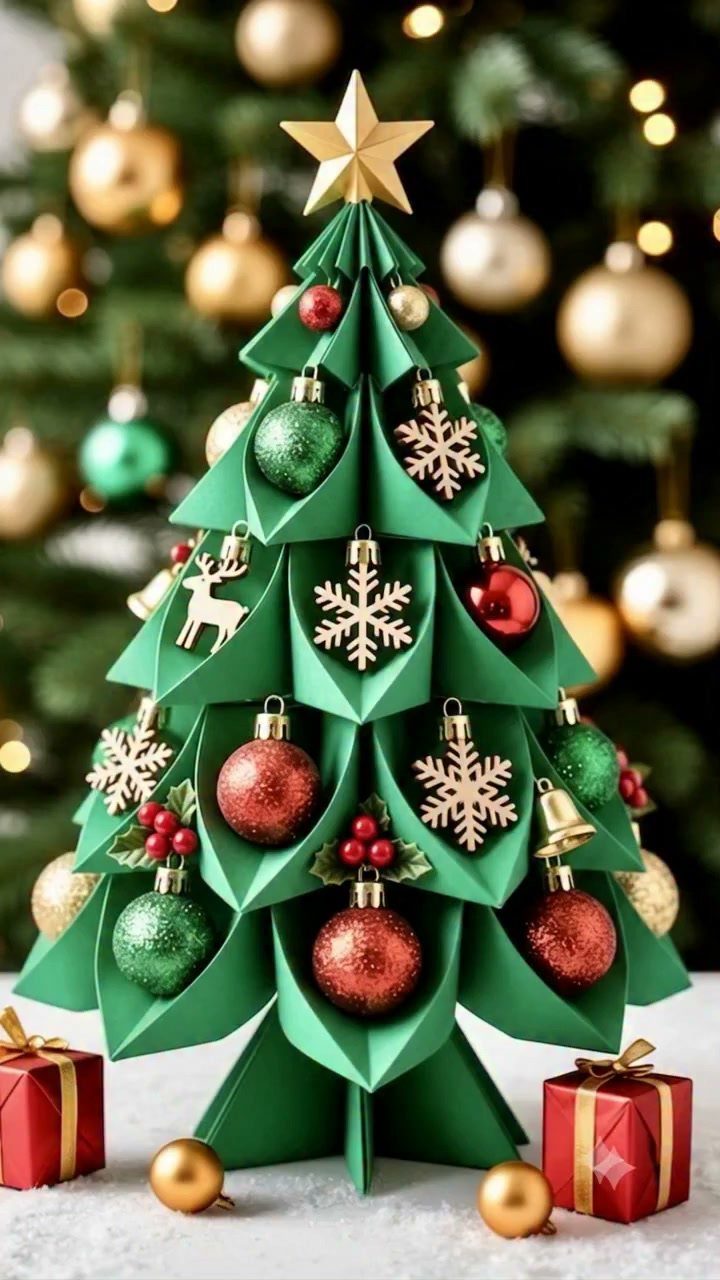
Green origami paper folds into a tiered tree that holds miniature ornaments and a paper star.
The fold count is what makes this one slow. My first attempt with 3-inch and 1.5-inch pieces failed; the creases multiply faster than the paper tolerates at that size.
Sara Adams uses 6-inch and 3-inch pieces in her tutorial, and Francesco Guarnieri, the designer, recommends doubling even that. Thicker paper than standard origami stock helps the structure survive the handling.
Budget an evening, expect to restart once or twice, and quit while the paper still has crisp edges. Budget an evening, expect to restart once, and reserve the smallest tiers for last when your fingers have the rhythm.
4. 3D Origami Star for Christmas Tree
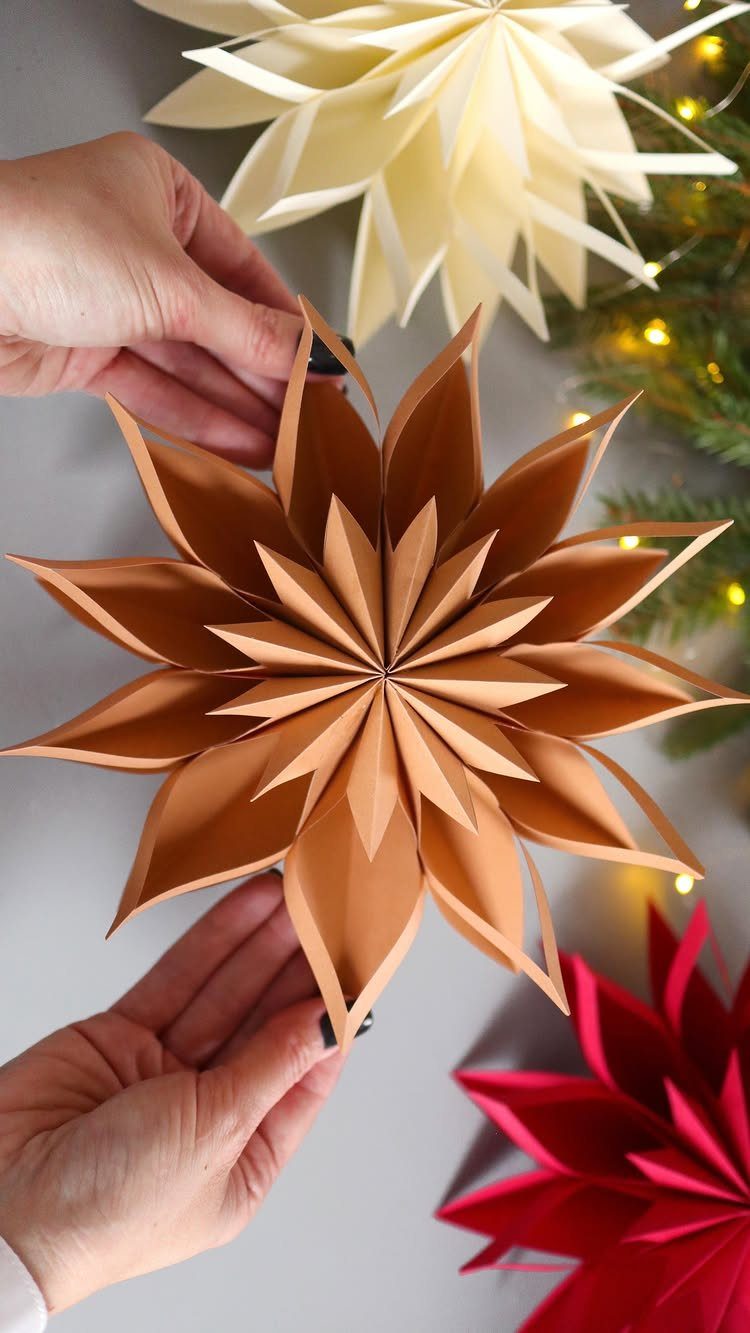
A 3D folded star from cardstock replaces the store-bought tree topper.
Cardstock holds the angles without the abuse that softer paper takes.
Tan, red, and cream versions all work, so the color is flexible.
Match it to your tree palette or let it contrast. Size depends on your top branch spacing; make one test star before committing to a full set.

EASY TO USE SIZE - This 2 oz bottle of Mod Podge Dimensional Magic features an easy-to-use writer tip. This formula is milky when wet, but iridescent when dry

CONVENIENT & VERSATILE SIZE – Add this top-rack, dishwasher safe multi-purpose, all-in-one glue, sealer, and finish in an 8 oz bottle to your art supplies.
5. DIY Wooden Christmas Tree
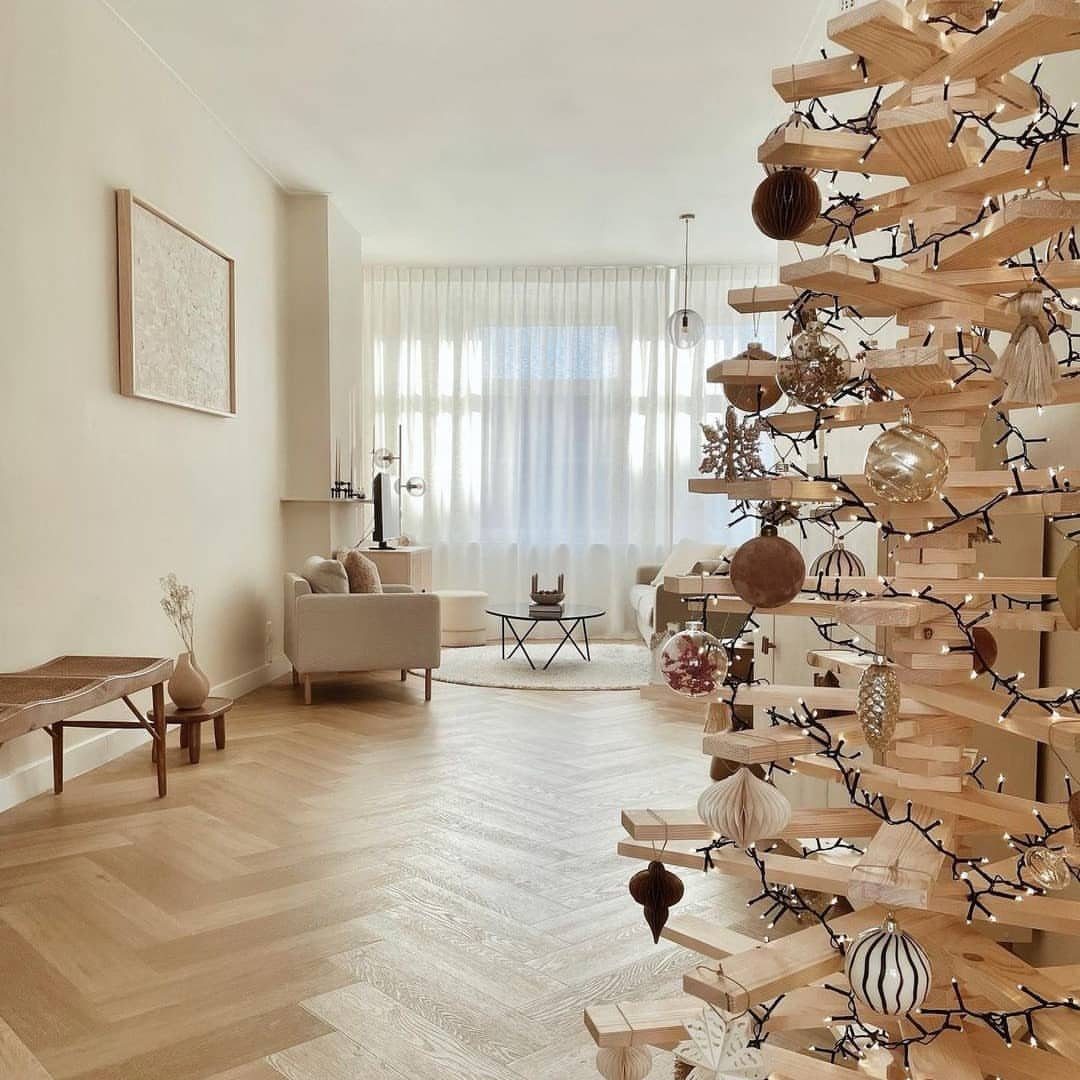
Scrap wood trim, a dowel rod, and a candlestick holder stack into a rotating slat tree.
The visible version sits on a console table in a foyer, dressed with string lights and neutral ornaments. Assembly is layered cuts around a central dowel; the rustic look comes from uneven edges and natural grain rather than sanding.
This trades height for storage: flat pieces come apart and slide into a drawer. Check your scrap pile first; trim pieces too thin will split when drilled.
A small bolt through the center of each layer lets the slats spin to whatever angle looks right, and you can tighten it if they loosen over a season.

Wooden Christmas Tree Cutouts: the package includes 12 pieces of unfinished wooden Christmas tree cutouts, each wood Christmas cutout is about 10 x 8.8 cm/4.33 x 3.47 inches, and the thickness is 1.5 cm/0.59 inches, the sufficient quantity and proper size can fully meet your different needs, such as DIY crafts and make Christmas decorations

Package Includes: You will receive 24pcs 3D wooden Christmas tree crafts measuring 2 x 3 inches, with 4 different styles, and each style has 6 pcs. A sufficient quantity will fully meet your decoration needs for Halloween or Thanksgiving parties

Endless Possibilities for Christmas Decorations: this is a set of handmade unfinished wooden Christmas trees; They are crafted by hand, sanded to a smooth surface, and stable enough to be placed on any flat surface; They are suitable for DIY personalized Christmas crafts and decorating your holiday parties
6. Stacked Button Christmas Trees
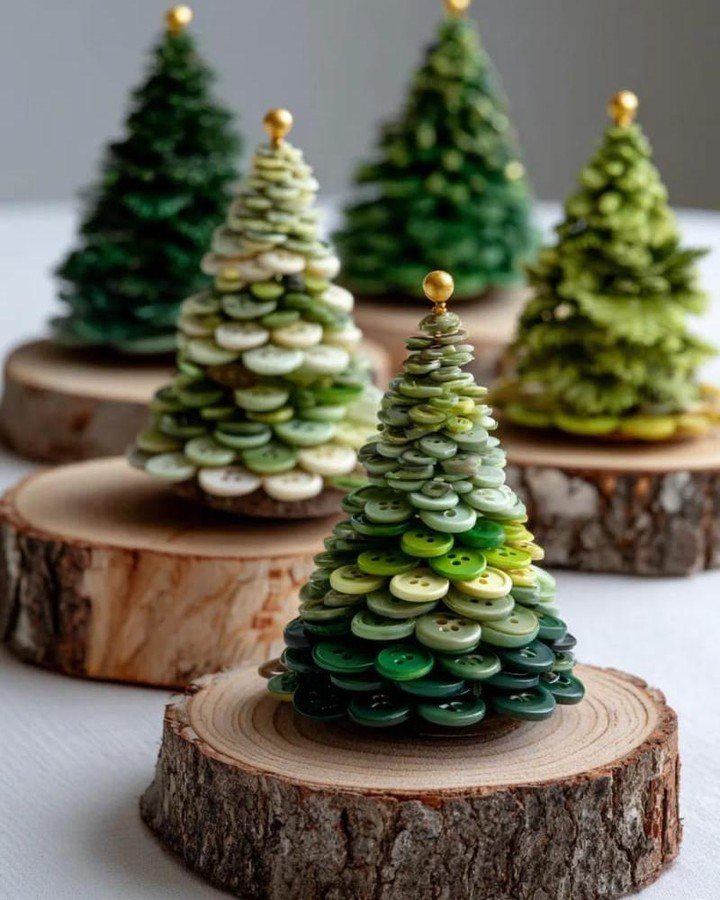
Graduated buttons, a wooden base, and a bead for the top.
The visible trees run green to cream, which reads as evergreen with snow. Before buying buttons, sort what you have by diameter; the conical shape needs a steady size drop from base to tip.
A natural wood slice base steadies the stack without glue if the center hole fits a wire or toothpick run through the middle.
This scales to the button supply. One jar of mixed greens makes a forest; stick to two tones for a cleaner look.

All-in-One Framed Pearl Art Kit (Beginner to Pro): Exquisitely framed kit includes pre-printed patterns, numbered pearls, full set of tools and a ready-to-hang frame. No professional skills required—just match pearls to numbers. Whether you're a crafting novice or a creative expert, you can easily create exclusive handmade decorations.

12 Different styles: the package comes with 12 pieces of Christmas ornament kits, available in 12 different styles, 1 piece for each style, which are designed with Christmas-themed patterns, lovely and easy to draw others' attention, ideal for decoration

15 Different Styles: you will receive 15 pieces of hot cocoa diamond art ornaments kits; There are 15 different styles to choose from, 1 piece of each style, using hot cocoa theme design, cute enough to meet your DIY decorative needs and sharing needs
7. Wicker Cone Christmas Tree
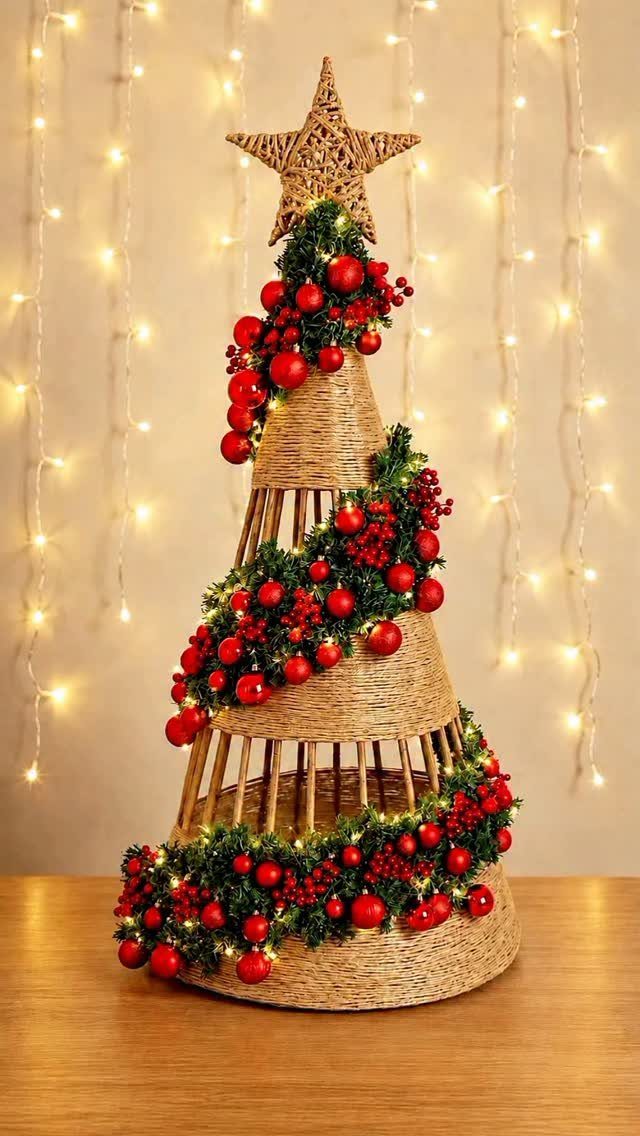
A wicker cone tree skips the needle drop and the storage fight.
The visible version wraps greenery, red berries, and fairy lights around an open weave, so the glow shows through rather than sitting on top.
Check your cone’s base width against the surface you have in mind; a narrow foot on a wide console reads skimpy.
Battery lights matter here, since the weave hides cords poorly. The star topper sits loose, which is either a plus or a wind risk near a door.

PRE-CUT ORNAMENT SHAPES - These colorful ornament shapes will be a festive addition to your holiday arts and crafts. They’re perfect for holiday decorations, creative gift tags, Christmas trees and more!


DIY ORIGAMI CHRISTMAS TREE KIT: Build a beautiful 3D layered paper Christmas tree topped with a star and mini gift boxes to place underneath.
8. Beaded Miniature Christmas Trees
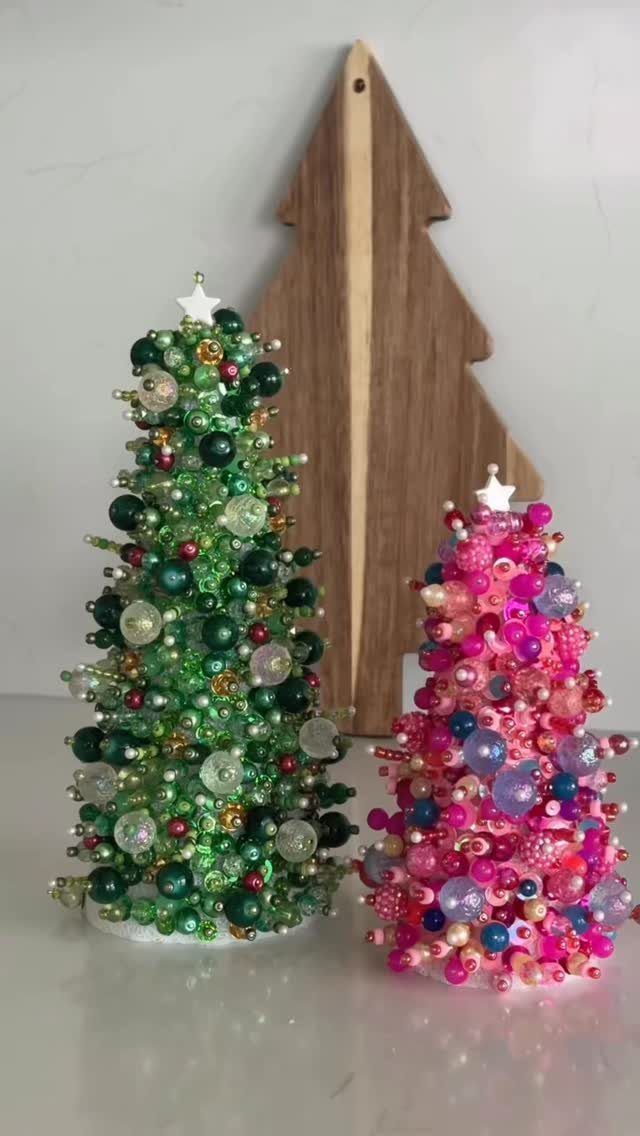
Stacked beads build a tree shape without any folding, cutting, or waiting for glue.
The visible pair runs green and pink with white star toppers, so color is the first decision.
String the largest beads at the bottom and step down by diameter toward the top; a single bag of mixed sizes will slow you down if you don’t separate them first.
A center wire or stiff cord holds the shape, with the star hot-glued or wired at the finish. 2 tones keep the shape readable; add a third and the eye starts to lose the taper.

COLOR : Red foil on frontside, white on backside. You can write on the front and back sides with a marker.

【EASY TO FOLD】: The origami star paper strips made of high-quality pulp and paper material. Paper of moderate thickness, and easy to fold. You can also fold a bouquet of stars and give it to family and friends.This is a great gift for anyone who enjoys doing this wonderful art form.

Pre made wishing lucky stars are mainly used for party decoration, holiday decoration, etc., to add festive atmosphere in various holiday activities, such as Christmas, Valentine's Day, weddings, birthdays, etc., as a romantic gift to friends, relatives, partners, etc., representing blessings and beautiful wishes. Origami paper lucky stars can also be used for various DIY craft activities, such as making bracelets, necklaces, ornaments, and other handicrafts
9. Shadow Box Textured Tree Craft
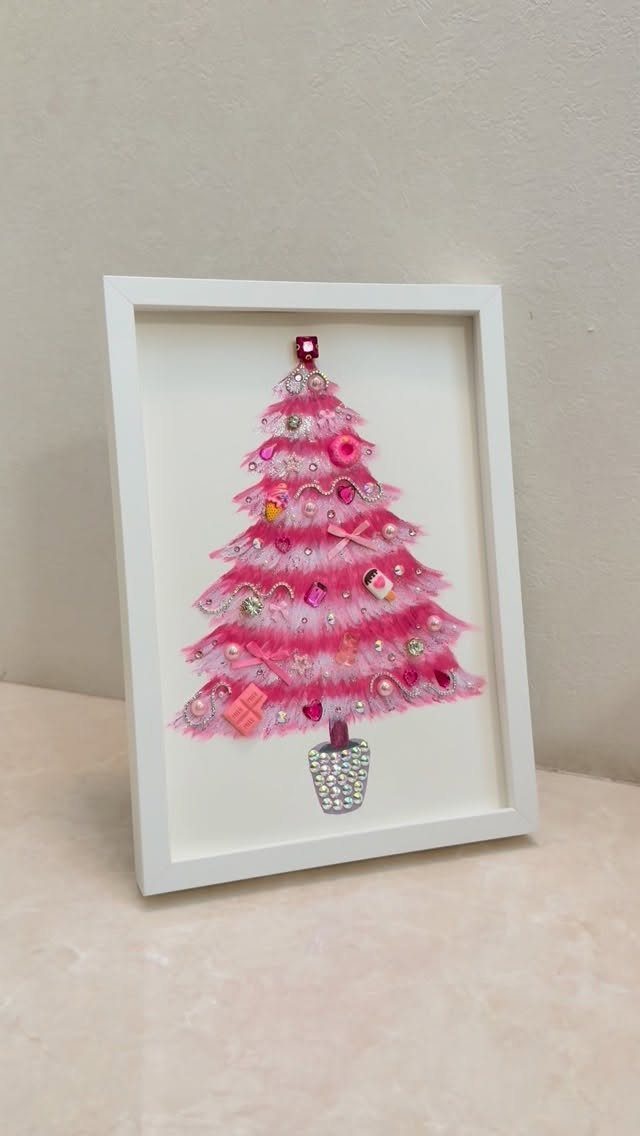
A shadow box turns a textured tree into wall art that stores flat.
The pink fuzzy surface in the visible version reads as craft paint or fiber paste built up with a palette knife, then pressed while wet for the irregular ridges.
Small charms and beads go on after the texture dries, which means 2 sessions minimum.
Check your frame depth: anything under 2 inches will crush the high points. A white box against a light wall keeps the focus on the tree; black or wood shifts the whole mood.
The background could stay empty or carry a light wash. That choice comes after the tree is done and you can test it in place.

This pink unicorn ornament is a whimsical addition to your holiday décor or Christmas tree

ALL-IN-ONE KIT– Kit contains everything needed to finish and seal clay pot projects: 8 oz. Mod Podge Outdoor, 12 oz. Mod Podge Clay Pot Sealer, a 4-piece foam brush set, and a 12-pack of plant pokes.
10. Ruffled Glowing Tabletop Tree
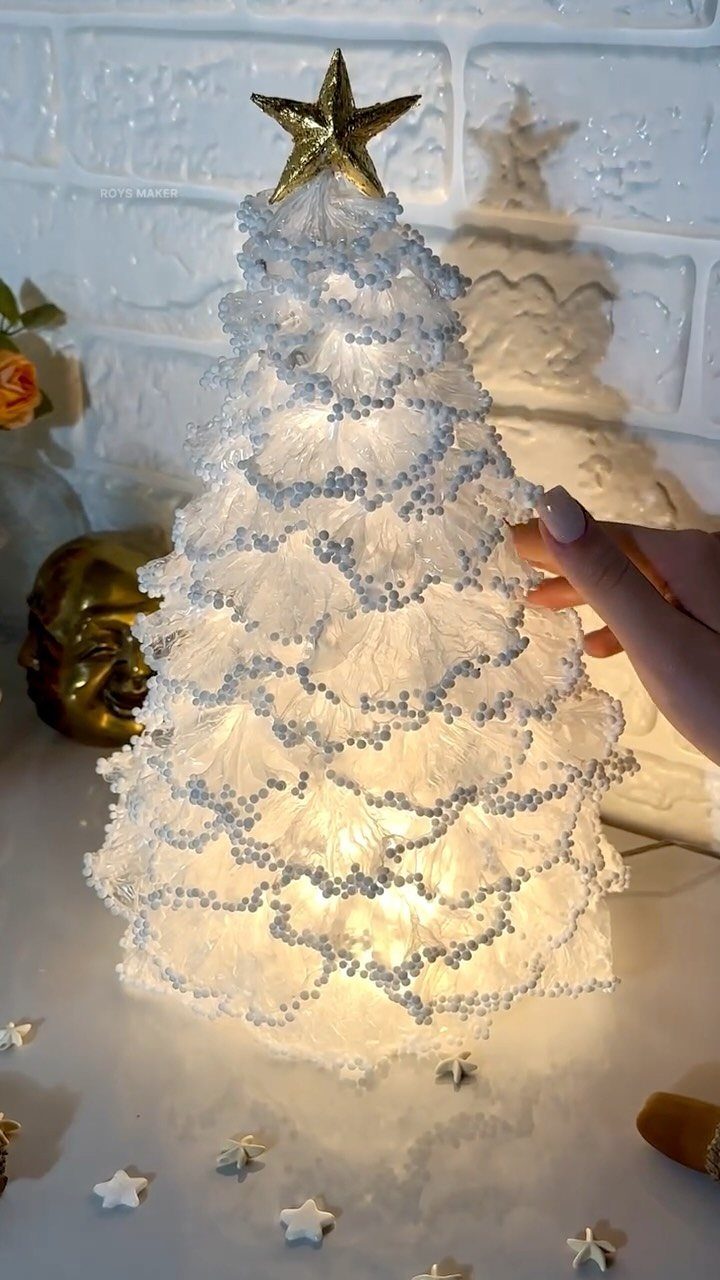
Ruffled fabric layers over a wire frame and lights from within.
The visible version glows white with a gold star, and the hand touching it shows the scale: small enough for a bedside table or a bathroom counter.
Fabric choice controls the effect; stiff organza or synthetic tulle holds the ruffle shape without constant fussing, and lighter colors pass more light.
The frame starts as a cone, either foam or wire, with LED strands wound inside before the fabric goes on. Check that your light color temperature matches the fabric; warm white against cool white reads as dirty.
Battery or USB power decides where this lives. No outlet, no glow.

Wooden Christmas Ornaments Kits: you will receive 300 pieces of unfinished wood Christmas ornaments in 30 different styles, 10 pieces of each style, come with 1 piece of the plastic storage box, which can easily meet your daily use and festival use

Christmas Tree Wooden Cutouts: you will get 3 pieces of unfinished Christmas tree wooden cutouts in 3 different sizes-20 x 11.5 cm/7.87 x 4.53 inches,15 x 9.8 cm/5.91 x 3.86 inches and 10 x 8.1 cm/3.94 x 3.19 inches, the assorted size Christmas tree cutouts can fully meet your different needs, such as DIY crafts and make Christmas decorations

Natural Wood Laser Cut - the size show clearly in the picture, please check. The length of the rope is approx 1.5M
Materials Needed
Most of these projects pull from the same small pool of supplies. Glue, scissors, and tape show up everywhere; the unicorn ornament depends on Mod Podge specifically, but any white craft glue thinned with water works in a pinch.
Crayons, markers, or acrylic paint cover surface color. Glitter, stickers, and sequins are optional on nearly everything except the unicorn, where the glitter is the whole point.
Beyond the basics, pom-poms, pipe cleaners, cotton balls, and recycled cardboard or fabric scraps fill gaps. Buttons, beads, wicker cones, and shadow box frames are the outliers, bought for a single project but reusable if the first attempt fails.
Kid-friendly Crafts
The unicorn ornament and the stacked button trees are the clear entries for younger hands.
Glue mixtures and small beads demand supervision, but the steps are forgiving. A plastic ball handles rough rolling; a dropped button stack re-stacks.
The origami trees rate harder.
My first run at 3-inch pieces failed, and even 6-inch wants patience most elementary kids do not have. Save this one for middle schoolers with an evening free, or plan to fold alongside them and carry the load.
Painting on canvas and the ruffled fabric tree sit in the middle. Wet paint and pressed glitter have no wrong result; fabric ruffling is repetitive but not precise.
The shadow box texture needs 2 sessions, which tests a child’s wait tolerance. The wooden slat tree involves drilling and wood glue, so the cutting and assembly stay adult work even if a child dresses the finished piece.
Decorative Purposes
These crafts scatter through a house rather than clustering on one tree.
Small pieces work as gifts or card inserts. Button trees scale to a jar of mixed greens, which means a forest of individual gifts from one supply buy.
Classroom projects favor the quick and flat: painted canvases for bulletin boards, paper folds for window lines. The shadow box stores flat once the frame comes off, which matters for teachers packing up in January.
Last-minute Ideas
The painted canvas and stacked bead trees finish fastest.
Wet paint dry time is the only real wait; beads string in minutes if you sort by diameter first. The ruffled fabric tree runs longer for the winding, but no step needs drying or curing.
The origami trees are the opposite. Even with good paper, the fold count adds up.
The unicorn ornament bakes clay and layers Mod Podge in coats; neither rushes. Glue curing time at each layer is what the wooden slat tree wants if the rotation is to hold.
A jar of mixed greens and a wood slice are all it takes; the stacking itself is the project.
Frequently Asked Questions
Can kids make these?
Kids handle the unicorn ornament and stacked button trees well, since plastic survives rough rolling and dropped buttons re-stack.
The origami trees need more patience than most elementary kids have; my first try with 3-inch pieces failed outright. Painting and fabric ruffling sit in the middle, while drilling and wood glue on the slat tree stay adult work.
What kind of paint works best?
Acrylic craft paint covers the canvas tree and most other projects here.
It dries fast and cleans up with water, which matters when you are pressing glitter or texture into wet color. The base decision matters more than the brand: bright white reads as snow, or pick something you can distress later.